Your First 10 Minutes
You've got FiestaBoard running at http://localhost:4420 and your board is connected. Now what? This guide walks you through everything you can do in your first 10 minutes to get the most out of your board.
1. Verify the Display Service
The display service starts automatically when the container is running. Open the dashboard at http://localhost:4420 and verify the status shows Running.
2. Enable Your First Plugins
Plugins are data sources - they pull information like weather, time, stock prices, and more so you can put that data on your board.
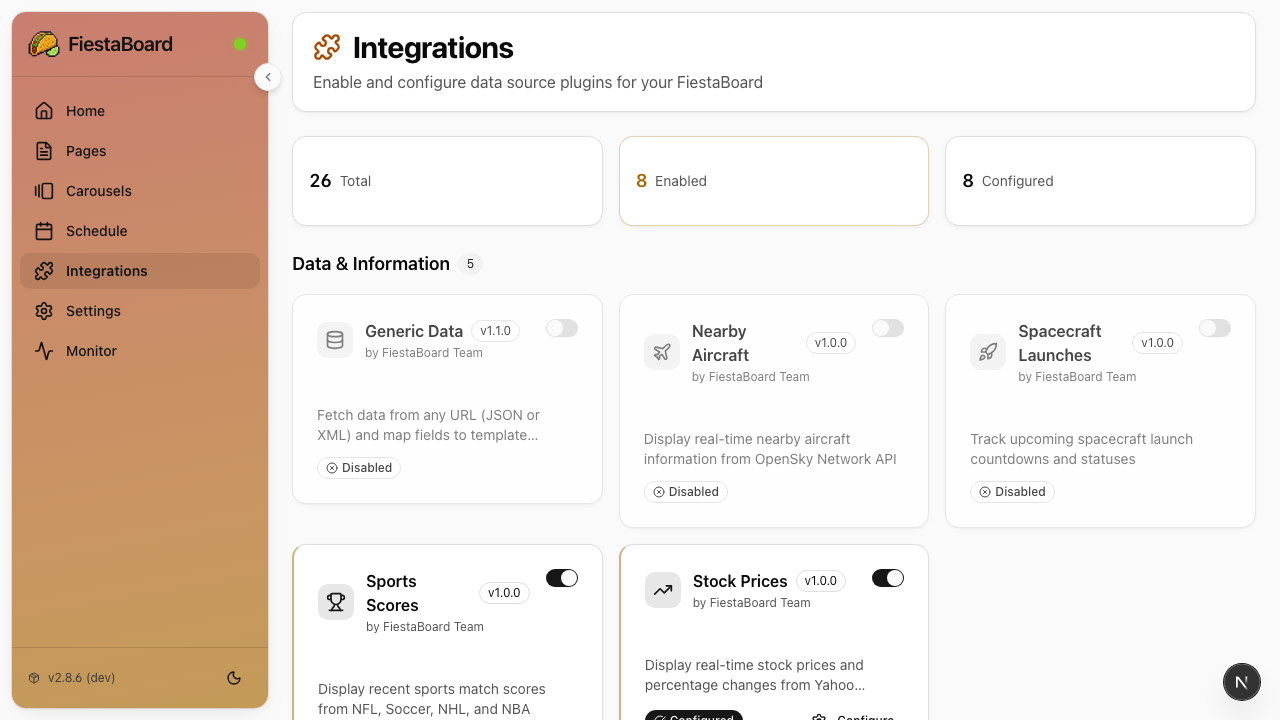
- Click Integrations in the navigation
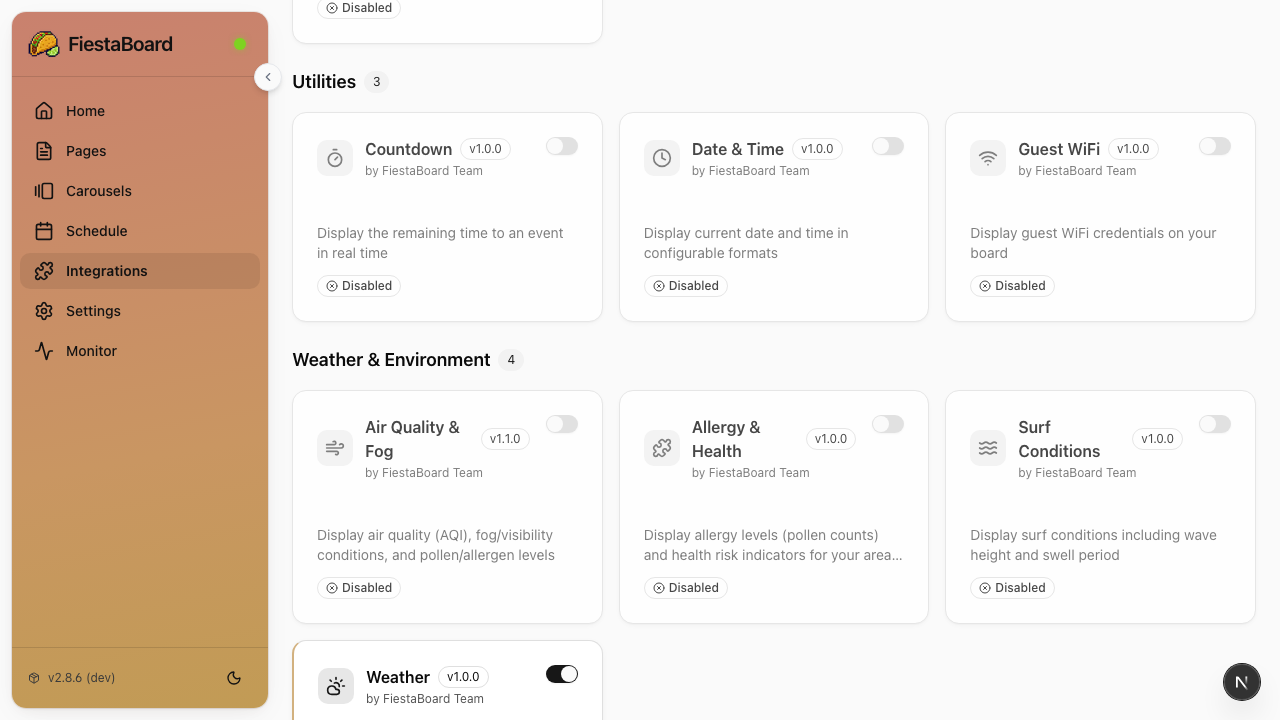
- You'll see all 26 available plugins. Start by enabling a few that need no API key:
| Plugin | What It Shows |
|---|---|
| Date & Time | Current date and time in various formats |
| Star Trek Quotes | Random quotes from TNG, Voyager, and DS9 |
| Visual Clock | A large pixel-art clock that fills the whole board |
| Sun Art | A full-screen art pattern that changes with the sun's position |
| Disney Parks | Current wait times for Disney park rides |
| Surf Conditions | Wave height and quality at popular surf spots |
| Guest WiFi | Your WiFi network name and password |
- Toggle each plugin on to enable it
- For Guest WiFi, enter your WiFi network name and password when prompted
You can always come back and enable more plugins later, including ones that need API keys (weather, traffic, stocks, etc.). The Integrations page links to setup instructions for each one.
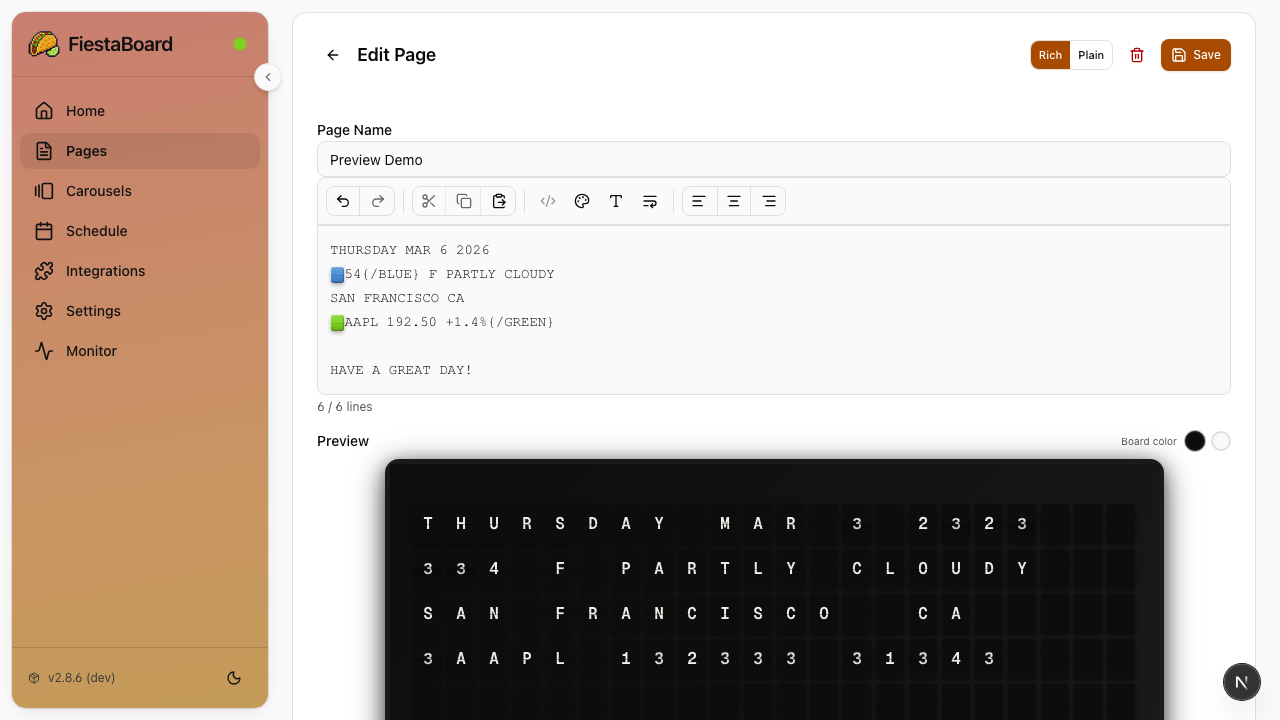
3. Create Your First Page
Pages are the templates for what your board displays. Each page is a layout you design using the visual editor.
- Click Pages in the navigation
- Select the tab matching your board type (Flagship for the standard 22x6 board, Note for the compact 15x3)
- Click New
- Give your page a name (e.g., "Morning Info")
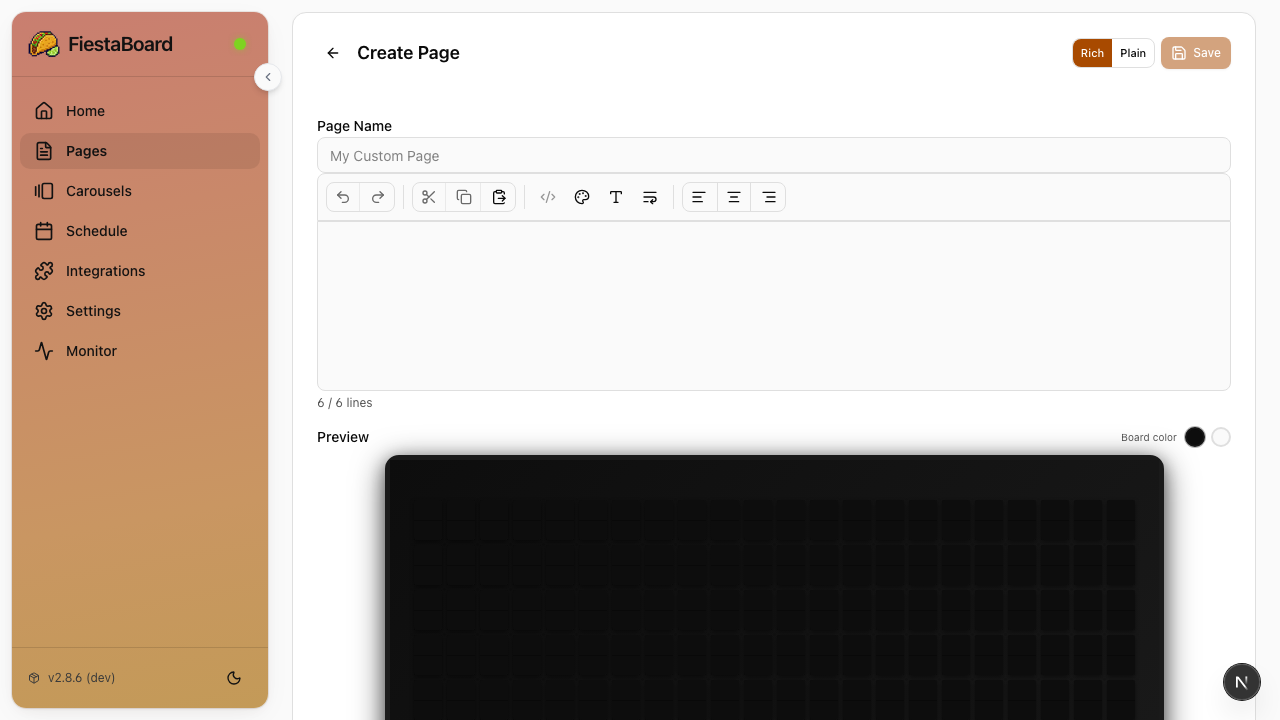
Type some static text
The editor shows a grid matching your board's dimensions. Click on a row and start typing. The preview shows exactly how it will look on your board.
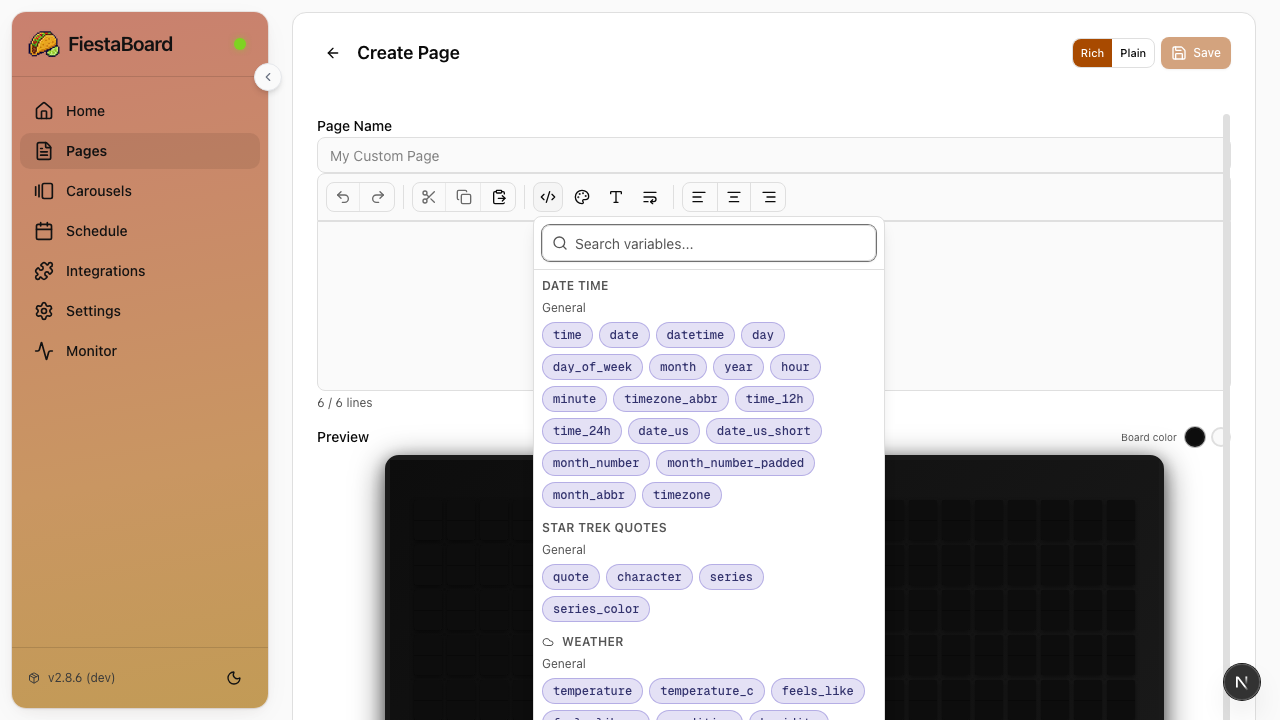
Add live data from plugins
This is where it gets fun. Click the Variables button in the editor toolbar. You'll see a list of all the variables available from your enabled plugins.
For example, if you enabled the Date & Time plugin, you'll see variables like:
{date_time.datetime}- Inserts the current date and time{date_time.date}- Inserts just the date{date_time.time}- Inserts just the time
Click any variable to insert it into your page at the cursor position. When the page is displayed on your board, the variable is automatically replaced with live data.
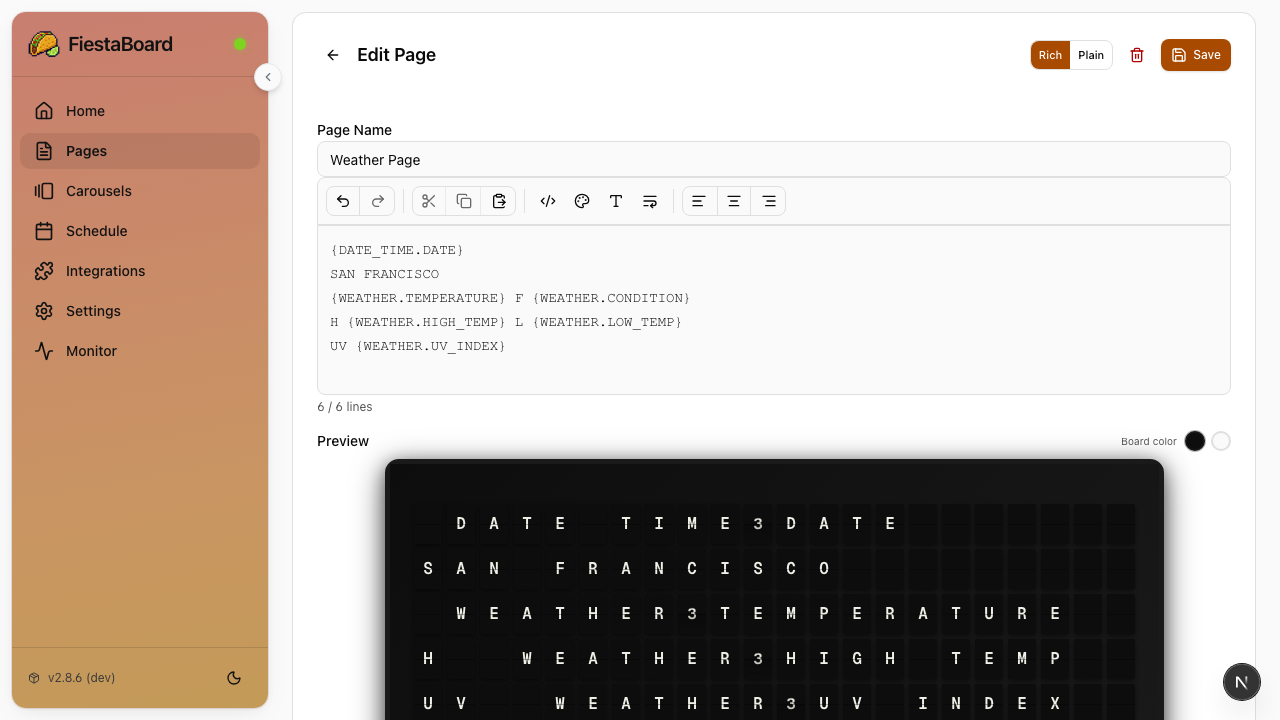
Example: A simple morning page
Here's a page layout you could create using Date & Time and Star Trek Quotes:
  GOOD MORNING
  {date_time.date}
  {date_time.time}

  {star_trek_quotes.quote}
Save your page
Click Save when you're happy with your layout. Your page is now stored and ready to use.
4. Display Your Page
Back on the Pages list, select your new page to make it the active page. Within about 60 seconds (or however long your refresh interval is), your board will update with the content from your page.
5. Try a Plugin-Only Page
Some plugins fill the entire board with formatted content. These are great for "set it and forget it" displays:
- Visual Clock - A large, attractive clock display
- Sun Art - An art pattern that changes throughout the day
- Surf Conditions - Full surf report with wave height and conditions
To use these, create a new page and insert just the plugin's main variable (e.g., {visual_clock.display} or {sun_art.display}). The plugin handles the entire layout.
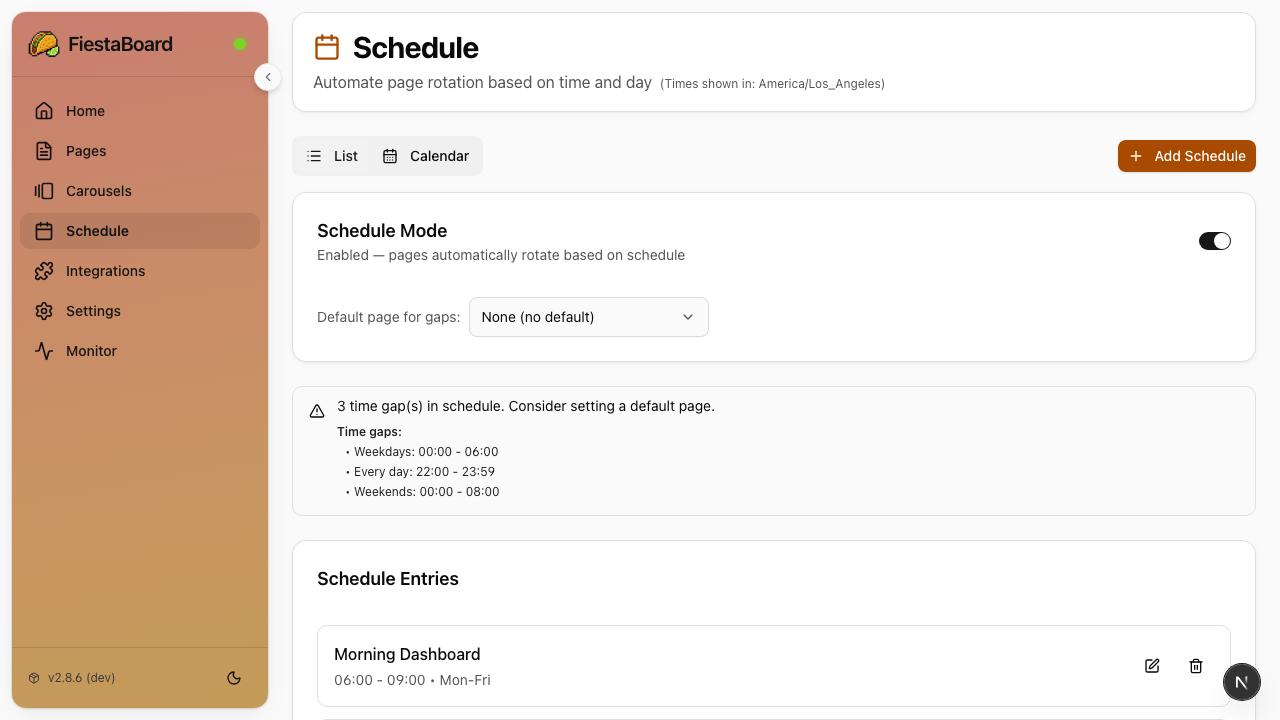
6. Set Up a Schedule (Optional)
Instead of manually switching between pages, you can have FiestaBoard automatically change pages based on the time of day.
- Click Schedule in the navigation
- Toggle Schedule Mode on
- Click to create a new schedule entry
- Choose:
- Which page to display
- Start time and end time
- Which days (every day, weekdays, weekends, or specific days)
- Repeat for other time slots
Example schedule for a home board
| Time | Page | Days |
|---|---|---|
| 7:00 AM - 9:00 AM | Morning Info (weather + commute) | Weekdays |
| 9:00 AM - 5:00 PM | Visual Clock | Weekdays |
| 5:00 PM - 10:00 PM | Evening (stocks + sports) | Weekdays |
| All day | Fun (Star Trek quotes + surf) | Weekends |
In Schedule settings, you can set a default page that displays whenever there's a gap in your schedule. This way your board always shows something.
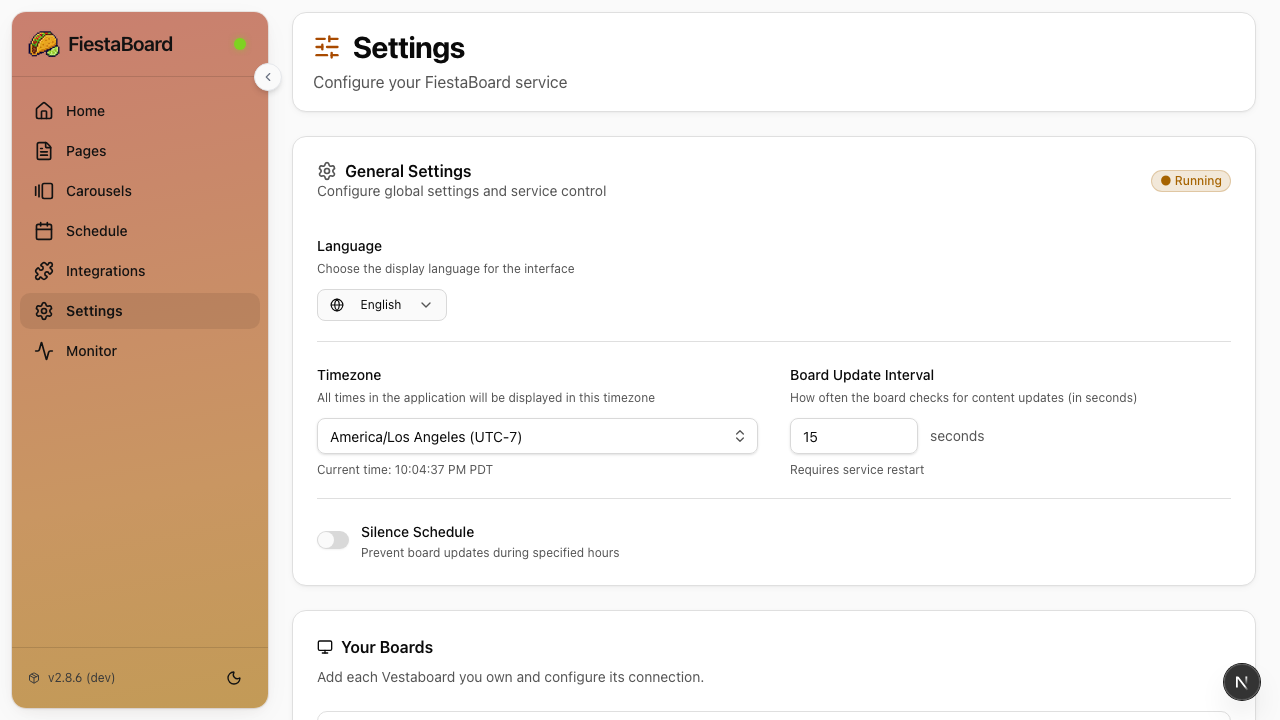
7. Set Quiet Hours (Optional)
Split-flap displays can be noisy when they flip. If your board is in a bedroom or living room, you'll want to set quiet hours:
- Go to Settings
- Find the Silence Schedule section
- Set a start time (e.g., 10:00 PM) and end time (e.g., 7:00 AM)
- Save
During quiet hours, FiestaBoard stops sending updates to the board. Whatever was last displayed stays on the board until quiet hours end.
What's Next?
Now that you have the basics down, here are some things to explore:
Add more data sources
Head to the Integrations page and set up plugins that need API keys. These are the most popular:
- Weather - Free API key from weatherapi.com (1 million calls/month free)
- Stocks - Works without an API key; optional Finnhub key for better search
- Sports Scores - Works without an API key
- Traffic - Requires a Google Routes API key (free tier available)
Design more pages
Create pages for different moods and times of day. Mix and match plugin variables to build exactly what you want. The Page Editor guide covers colors, alignment, and advanced formatting.
Explore all the features
- Color Guide - Add colored tiles to your pages
- Character Codes - Special characters available on the board
- Schedule Mode - Advanced scheduling with day patterns
- All Plugins - Full list of all 26 plugins