Beginner's Guide
Never used Docker or the command line before? No problem. This guide walks through every step clearly, from picking the easiest install path to seeing your first content on the board.
Time needed: About 15 minutes.
What You'll Need
- A split-flap display that's already set up and working with the board's app
- Your board's API key (Step 2 below shows you where to find it)
- An internet connection
- Either a Raspberry Pi + microSD card (see The Easiest Path: Flash a Raspberry Pi), or a computer (Mac, Windows, or Linux) where we'll install Docker
The Easiest Path: Flash a Raspberry Pi
The simplest, most reliable way to run FiestaBoard — even if you've never touched a Pi or a terminal — is to flash a Raspberry Pi with our pre-built FiestaPi image.
No Docker setup. No command line. No config files. Self-updating with one click.
If you have (or are willing to buy) a Raspberry Pi, this is by far the easiest route. Here's the whole process:
- Get a Raspberry Pi (3B or newer — the Pi 4, Pi 5, and the inexpensive Pi Zero 2 W all work), plus a microSD card (8 GB minimum, 16 GB+ recommended) and a 5 V power supply.
- Download Raspberry Pi Imager — a free, official tool from the Raspberry Pi Foundation that flashes images to SD cards. Available for Mac, Windows, and Linux on the Raspberry Pi Imager downloads page.
- Download the FiestaPi image from our GitHub Releases page — grab the file named
FiestaPi-<version>-arm64.img.xz. - Flash the SD card with Raspberry Pi Imager:
- Choose Device → your Pi model
- Choose OS → scroll to the bottom → Use custom → pick the
.img.xzfile you downloaded - Choose Storage → your SD card
- Click Next and use Edit Settings to pre-configure your Wi-Fi network and timezone
- Click Write and wait ~5 minutes
- Insert the SD card into the Pi, plug it in, and wait 2–3 minutes for first boot.
- Open a browser on any device on the same network and go to the FiestaBoard setup wizard at
http://fiestapi.local:4420. - Skip ahead to Step 2 below to grab your board's API key, then enter it in the wizard. You're done.
That's the whole thing. No Docker. No Terminal. No PowerShell. The Pi runs FiestaBoard 24/7 and updates itself with one click in Settings → System when new versions release.
→ For the full step-by-step Pi-flash guide with screenshots and troubleshooting, see FiestaPi Quick Start.
Alternative: Run on Your Computer with Docker
Don't have a Pi (or want to use a computer you already own)? Continue with the Docker-based setup below. It works, but there are more moving parts than the Pi-flash path.
Step 1: Install Docker
Docker is free software that runs FiestaBoard in a self-contained package. You only need to install it once.
Mac
- Go to Docker Desktop for Mac
- Click Download (choose Intel or Apple Silicon based on your Mac)
- Open the downloaded file and drag Docker to your Applications folder
- Open Docker Desktop from Applications - it will ask for permission to run
- Wait for Docker to finish starting (the whale icon in your menu bar will stop animating)
Windows
- Go to Docker Desktop for Windows
- Click Download for Windows
- Run the installer and follow the prompts (enable WSL 2 if asked)
- Restart your computer if prompted
- Open Docker Desktop - it should start automatically
Linux
Open a terminal and run:
curl -fsSL https://get.docker.com -o get-docker.sh
sudo sh get-docker.sh
sudo usermod -aG docker $USER
Log out and back in after running these commands, then verify Docker is working:
docker --version
Step 2: Get Your Board API Key
Your board API key is what lets FiestaBoard talk to your display. You can use either the Local API or the Cloud API.
Local API (Recommended)
This is faster and supports transition animations. Your board and computer need to be on the same WiFi network.
- Go to the Vestaboard Local API token page and request a Local API enablement token
- After approval, Vestaboard will email you the token
- Use the token to enable the Local API on your board — FiestaBoard's setup wizard and Settings page can do this for you (select the Enablement Token option and enter the token), or see the Vestaboard Local API docs for how to do it via
curl - Save the API key returned in the response, and note your board's IP address (you can find it on your router or use FiestaBoard's network scan)
Cloud API
Use this if your board and computer are on different networks, or if Local API isn't available for your board.
- Go to your Vestaboard account at web.vestaboard.com and log in
- Navigate to the API section
- Enable the Read/Write API
- Copy the API key and save it somewhere safe
Step 3: Get FiestaBoard Running
Choose the path that's easiest for you:
Path A: Docker Hub Pull (Simplest - no Git needed)
This is the fastest way. Open Terminal (Mac/Linux) or PowerShell (Windows):
On Mac: Press Cmd+Space, type "Terminal", press Enter. On Windows: Press the Windows key, type "PowerShell", press Enter.
Then paste these three commands one at a time:
mkdir -p ~/fiestaboard && cd ~/fiestaboard
curl -O https://raw.githubusercontent.com/Fiestaboard/FiestaBoard/main/docker-compose.hub.yml
docker-compose -f docker-compose.hub.yml up -d
Wait for it to finish downloading and starting (this takes 1-2 minutes the first time). When you see the terminal prompt again, FiestaBoard is running. Skip to Step 4.
FiestaBoard stores all your settings (board API keys, weather keys, pages, schedules, etc.) in a data folder it creates inside ~/fiestaboard. Whenever you update FiestaBoard later, you must cd ~/fiestaboard first so Docker can find that data folder. If you forget and run the update from a different folder, FiestaBoard will look like a brand-new install with nothing configured. (Don't worry — your old settings aren't deleted, they're just in the original folder. See Troubleshooting if this happens.)
Path B: Clone and Install Wizard
If you'd prefer to use the install wizard that guides you through setup:
git clone https://github.com/Fiestaboard/FiestaBoard.git
cd FiestaBoard
Then run the install wizard:
# Mac/Linux
./scripts/install.sh

# Windows (PowerShell)
.\scripts\install.ps1
The wizard will:
- Check that Docker is installed and running
- Ask for your board API key and device type
- Start the server
- Open the setup page in your browser
Path C: Download ZIP (No Git, No curl)
- Go to the FiestaBoard repository on GitHub
- Click the green Code button
- Click Download ZIP
- Extract the ZIP file to a folder you'll remember (like Documents)
- Open Terminal/PowerShell and navigate to the extracted folder:
cd ~/Documents/FiestaBoard    # Mac/Linux
cd Documents\FiestaBoard # Windows - Run the install wizard:
./scripts/install.sh           # Mac/Linux
.\scripts\install.ps1          # Windows
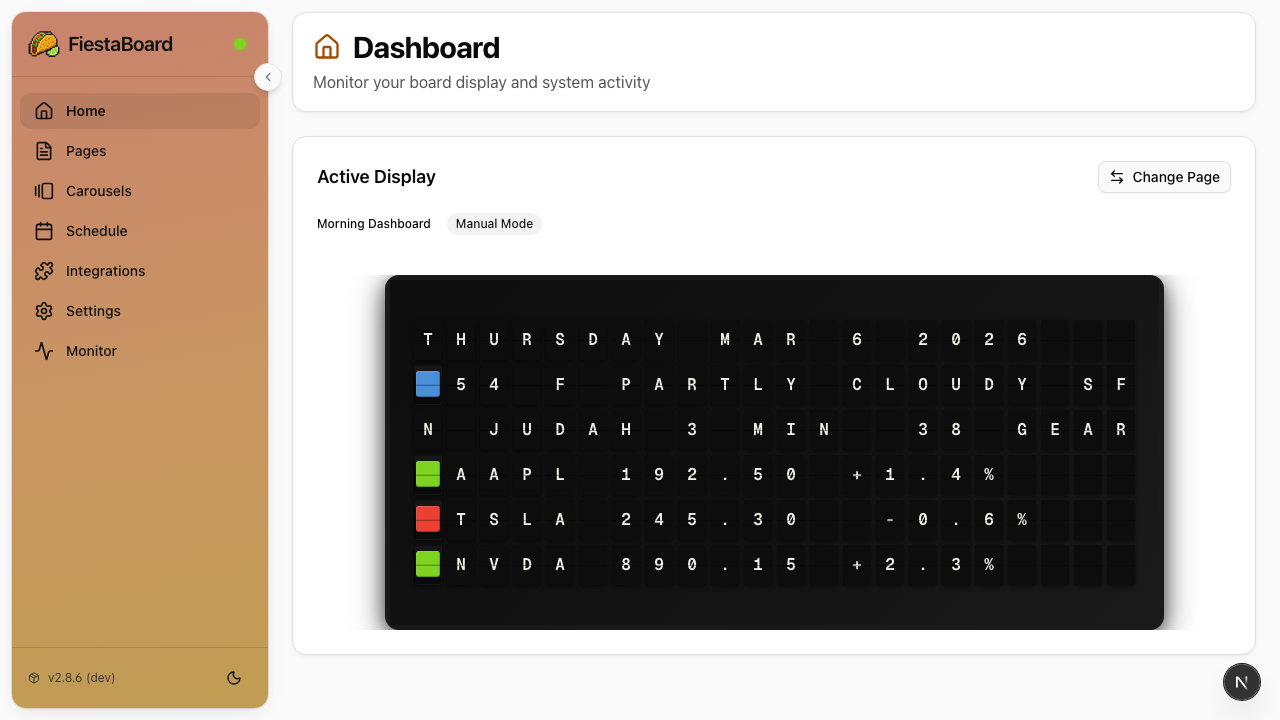
Step 4: Open FiestaBoard
- Open your web browser (Chrome, Firefox, Safari, Edge - any will work)
- Go to http://localhost:4420
- You should see the FiestaBoard dashboard

FiestaBoard automatically advertises itself on your local network. Try http://fiestaboard.local:4420 from any device on the same WiFi. If that doesn't work, use the IP address of the computer running FiestaBoard (e.g. http://192.168.1.50:4420).
If the page doesn't load, wait 30 seconds and try again - the server may still be starting up. Make sure Docker Desktop is running (look for the whale icon in your system tray or menu bar).
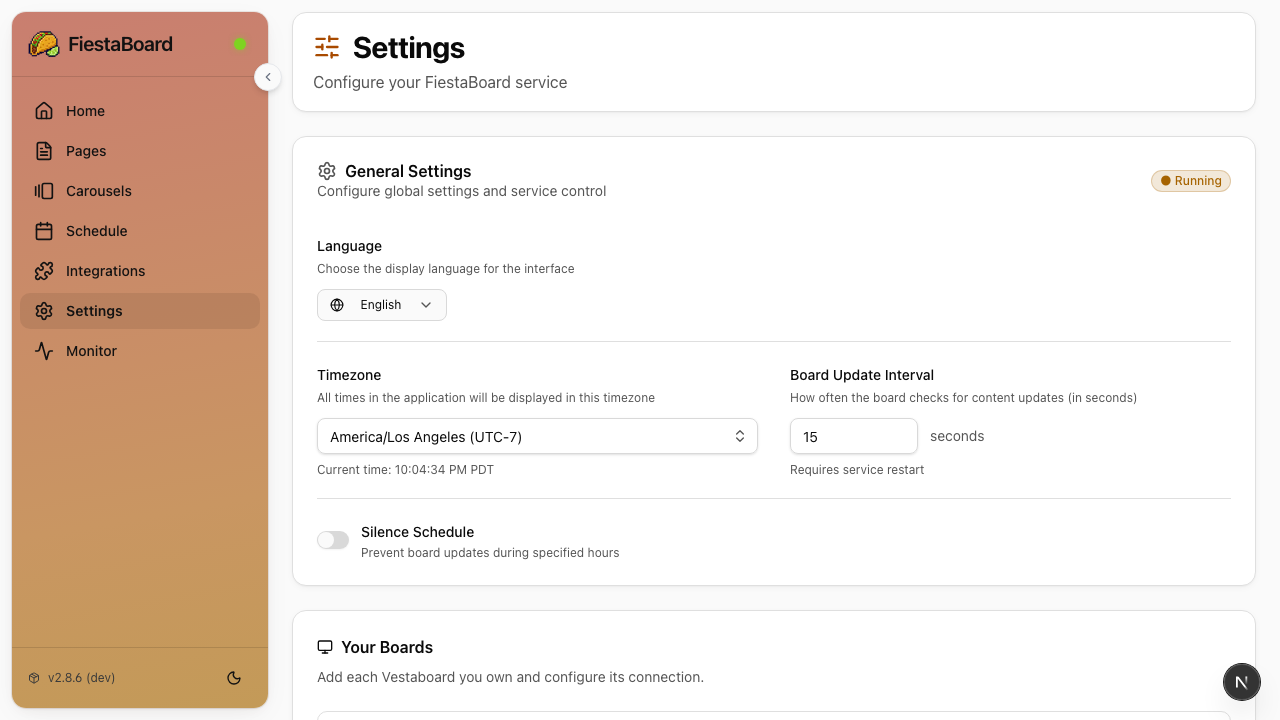
Step 5: Connect Your Board
If you used the install wizard (Path B or C), you may have already entered your API key. If not:
- In the FiestaBoard dashboard, go to Settings
- Enter your board API key (from Step 2)
- If you're using the Local API, also enter your board's IP address (settings save automatically)
Step 6: Verify the Service is Running
- Go to the main dashboard at http://localhost:4420
- The display service starts automatically — verify the status shows Running
- Your board should start updating within a few seconds
Congratulations - your board is now controlled by FiestaBoard!
Step 7: Make It Yours
Now the fun part. Here's what to do next:
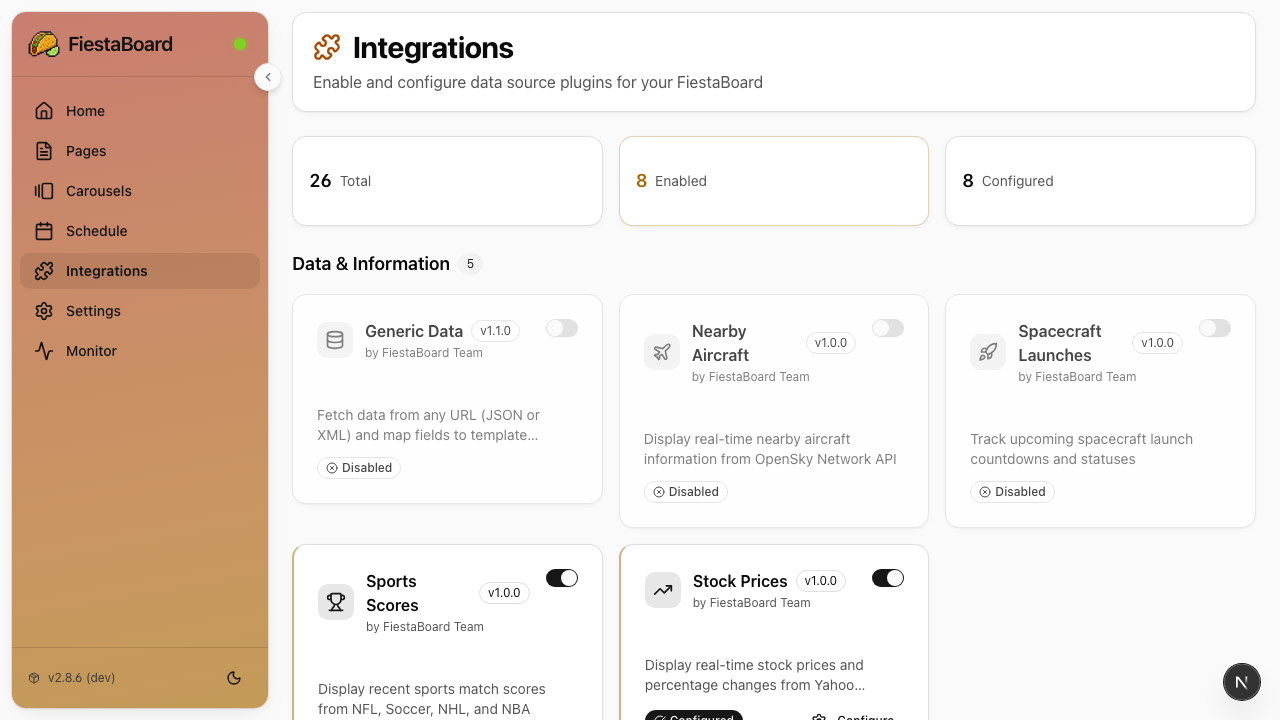
Enable some plugins
- Go to the Integrations page
- Toggle on plugins you're interested in
- Plugins that need API keys will show you where to get them
Start with these (no API key needed):
- Date & Time
- Star Trek Quotes
- Guest WiFi
- Visual Clock
- Sun Art
- Disney Parks
- Surf Conditions
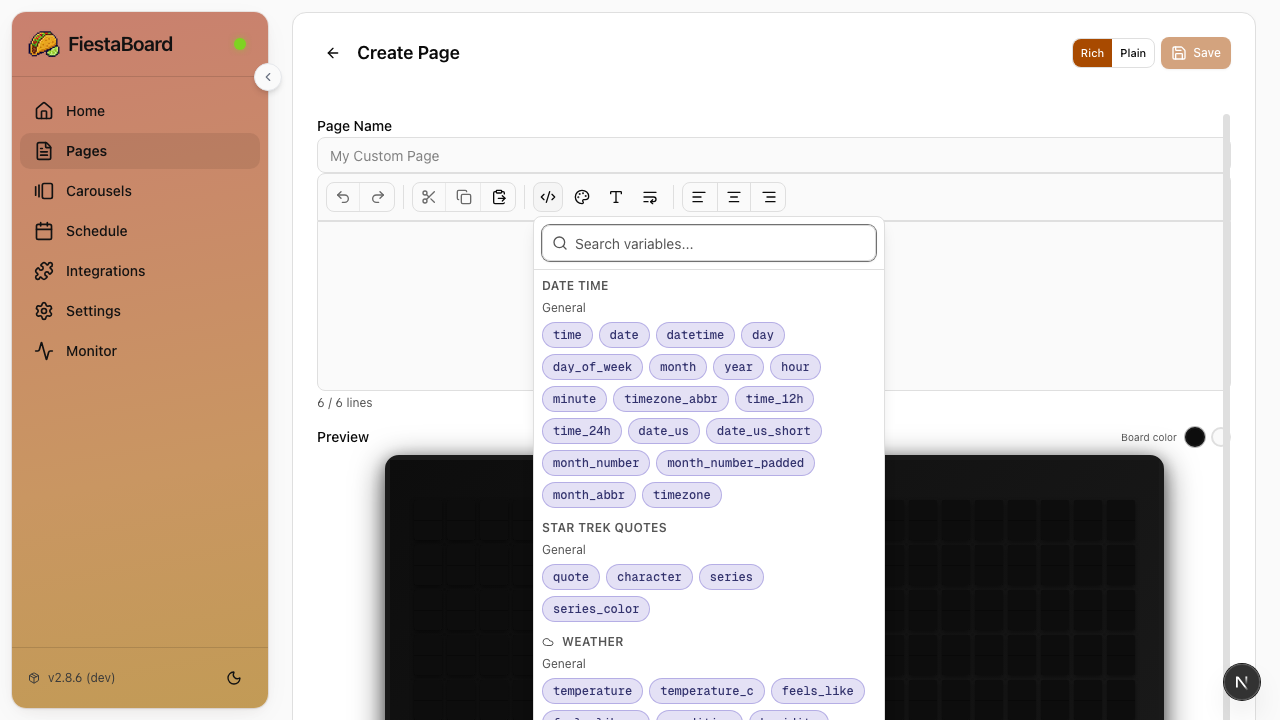
Create your first page
- Go to the Pages section
- Click New
- Use the visual editor to type what you want on the board
- Use the Variables button to insert live data (like
{weather.temperature}or{date_time.datetime}) - Click Save
Set it as active
- Select your new page from the Pages list
- Click to make it the active page
- Your board will update within a minute
For a more detailed walkthrough of these features, see Your First 10 Minutes.
Stopping and Starting FiestaBoard
To stop
Go back to your Terminal/PowerShell and type:
docker-compose down
To start again later
Open Terminal/PowerShell, navigate to the FiestaBoard folder (if applicable), and type:
docker-compose up -d
Then go to http://localhost:4420 — the service starts automatically.
If you used Path A (Docker Hub pull), make sure you're in the folder where the docker-compose.hub.yml file is, and use:
docker-compose -f docker-compose.hub.yml up -d
Common Issues
"Docker is not running"
Make sure Docker Desktop is open. Look for the whale icon in your menu bar (Mac) or system tray (Windows). On Linux, run sudo systemctl start docker.
Page won't load at http://localhost:4420
- Wait 30-60 seconds after starting - the server needs time to initialize
- Make sure Docker containers are running: type
docker psin Terminal/PowerShell - Make sure nothing else is using port 4420
Board not updating
- Check that the service shows Running on the dashboard
- Verify your board API key is correct (go to Settings)
- For Local API: make sure your board and computer are on the same WiFi network
- Check the logs:
docker-compose logs -f
Still stuck?
- Check the full Troubleshooting Guide
- Ask in the Discord community
- Open an issue on GitHub
Next Steps
- Your First 10 Minutes - Detailed walkthrough of creating pages, enabling plugins, and scheduling
- Plugins Overview - See all 23 available plugins
- Schedule Mode - Automate when different pages display
- Quick Start - Condensed reference for experienced users